In GD&T, a datum target may be used to specify a point, line, or area on a part to establish a datum. This is sometimes necessary when a part feature is too large or naturally irregular to create a datum.Parts that are cast, forged, or molded often benefit from the use ofdatum targets.
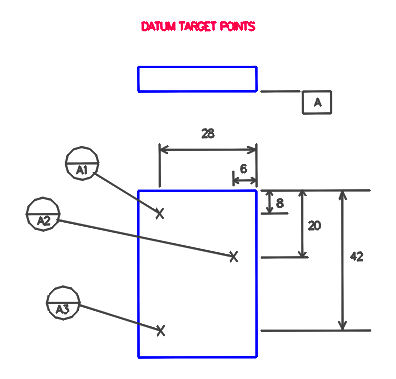
In cases where a surface will be used to establish a datum, the designer may designate either points or areas of contact on asurface as datum targets. The figure below demonstrates datum target points. The targets are numbered and are assigned the same letter as the datum – A1, A2, and A3 will establish datum A. Three points are required to create a plane, so three targets are shown on the drawing. Dimensions are specified to locate the datum targetpositions and note that these dimensions do not have tolerances – they are subject only to the accuracy of the measurement equipment. These three points represent the locations where the measurement equipment will touch the part to create datum A.

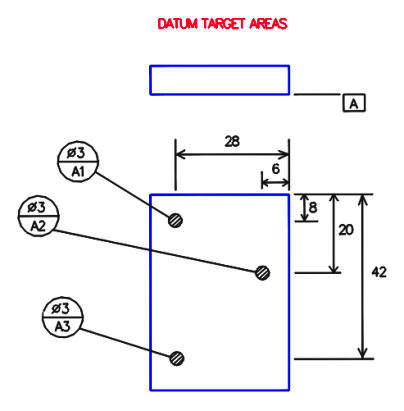
Below, three datum targets are still used to establish datum A. This time, however, areas of contact are designated as the datum targets. Note that the datum target circles now have a dimension in the top half indicating the size of the target area, and the X’s from the previous figures are replaced with circular phantom areas to show the targets on the part drawing. In this case the measuring equipment could contact the part anywhere within the three circular areasto establish the datum, or use the entire circular areas if necessary.
