In GD&T, circularity tolerance is used to control the roundness of circular parts or features. Some examples of circular features include cylinders, spheres, and cones. Sometimes circular surfaces are usedfor moving partssuch as ball bearings or spools, inwhich case circularityhelps ensure theseparts move smoothly andwear evenly. Because circularity is applied to an individual surface, this tolerance does not need to be related to a datum.
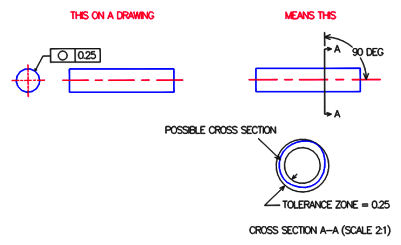
The first example of circularity tolerance is shown below. Although a cylinder is shown. this exampleapplies for conical shapes as well. The simple pin shown in the left figure has a circularity tolerance applied to it. The boxed symbols can be read “each circular cross section of this cylinder must lie between two concentric circles spaced 0.25 apart”. The right figure shows a sample cross section A-A and its possible roundness relative to the tolerance zone. Note that circularity applies to the entire length of the cylinder, and would therefore require multiple checks to verify the pin meets the specified tolerance over its entire length.

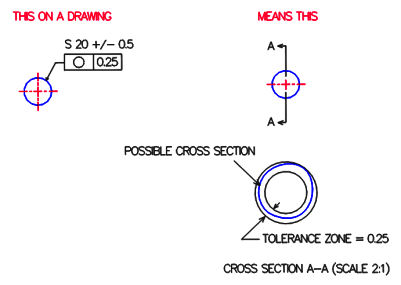
The second example of circularity is shown below and is applied to a sphere. In the case of a sphere, the circularity tolerance now applies in all directions since any cross section through the center of the sphere should be a circle. The verification of the sphere is therefore more involved than for a cylinder or cone, which would require measurement in only one plane.

