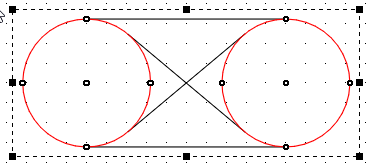
2D Drawing
Draw Lines and Shapes
Use straight lines, splines, circles, and rectangles to shape parts and specify features.
Draw Straight Lines, Splines, Circles, and Rectangles
- On the left toolbar, choose the straight line, spline, circle or rectangle tool.
- In the workspace, click a start location.
- At another location, click again.
Display and Draw Arcs
Note: The Arc tool is not automatically displayed.
- Check menu Edit > Preferences > Customize > Arc button.
- On the left toolbar, click the Arc tool.
- In the workspace, click a start location, then another location to specify the arc’s size and another to specify the arc angle.
Create Custom 2D Shapes
To create new custom shapes, use the Eraser tool to remove segments from intersecting lines.
- Using the left toolbar tools, draw overlapping lines and shapes.
- On the left toolbar, click the Eraser tool.
- Remove unwanted lines by clicking on them.
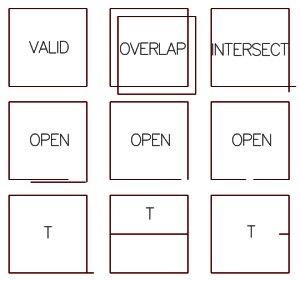
- Custom shapes must:
- be closed*
- not overlap
- not have intersecting lines
- not have “T” intersections
* Reasons that a shape may seem closed but generates an error:
- The opening is very small. Zoom in and double check for openings.
- The opening is covered by an overlapping shape. Move all lines by a small distance to check for underlying openings.
- The line type is set as a comment. Check the status of the line by clicking on it and viewing the Line Type drop list on the numeric bar.
- Lines may be meeting at a “T” intersection. If necessary, create separate shapes, or erase unneeded line segments.
Draw Freehand Lines and Shapes
Drawing freehand allows you to draw creative, artistic, and decorative lines and shapes.
- On the left toolbar, click the Freehand tool.
- In the workspace, click, hold and move the cursor to make a continuous line.
- Release the mouse button to complete the line or shape.
Note: It is not recommended to use freehand drawing for precise parts and designs. For the best experience, use a USB drawing tablet.
Size and Position Line and Shapes
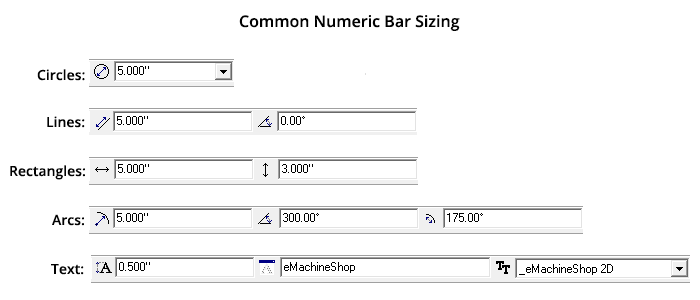
View and enter precise measurements on the Numeric Bar.
Accurately Size Line and Shapes
- Select a line or shape.
- On the numeric bar, enter the desired size.
- Press Enter.
Use scaling to resize groups of lines and shapes by a specified percentage.
- Select a group of lines or shapes.
- Choose menu Line > Scale and enter the desired scale percentage.
- Click OK.
Accurately Position Line and Shapes
- On the left toolbar, ensure the Snap to Lines button is pushed in.
- Drag a line or shape so one of the snap points on it meets a snap point (a small blue square appears) of another line or shape.
- In the nudge controls, enter the distance you want to move the selection, then click an arrow button.
These are the snap points for lines, shapes, and text:

Accurately Rotate Line and Shapes
- Select a line or shape and slowly double click it to enter rotation mode.
- In the nudge controls, enter a rotation angle.
- If desired, drag the center of rotation to a different location (to return it to the default position, double click on it).
- In the nudge controls, use the rotation buttons to rotate left or right.
Use Construction Lines
To position items accurately, often it is helpful to use “construction” lines.
- Draw a straight line or rectangle.
- On the property bar enter an exact length or size.
- Set the line type to Comment/Construction or Comment to Self.
- Drag an end or corner to a snap point.
- Drag another item to snap to the other end or corner of the construction line.
Measure Lines and Shapes
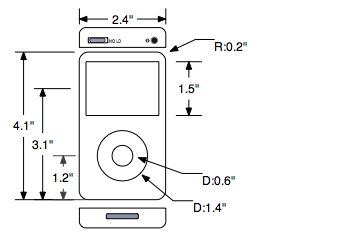
If you are working from an existing physical object, measure the size and position of its features using accurate tools, and make a dimensioned sketch.
Measure the Distance Between Two Points
- On the left toolbar, ensure the Snap to Lines button is pushed in.
- On the left toolbar, click the Ruler tool.
- Draw a line between the desired points.
Measure the Orthogonal Distance Between Two Points
- On the left toolbar, ensure the Snap to Lines button is pushed in.
- On the left toolbar, select the Rectangle tool, and draw a rectangle by snapping opposite corners to the two points.
- On the numeric bar, note the measurements of the rectangle.
- Delete the rectangle.
Copy Lines and Shapes
Duplicate lines and shapes to save time.
- Select a line or shape.
- On the nudge control, click the Repeat button.
- On the nudge control, set the desired distance between each copy.
- Press an arrow key once per copy.
Make Repeated Patterns
Repeat lines or shapes vertically, horizontally, or in circular patterns.
- Select the line or shape.
- In the nudge controls, set the desired distance between copies.
- In the nudge controls, push in the Repeat button, then click an arrow key once per copy.
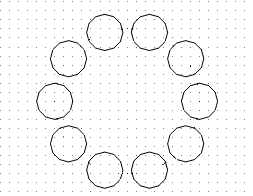
Duplicate and rotate lines and shapes at a precise angle to make circular patterns.
- Select the line or shape.
- If needed, slowly double click the selection to enter rotation mode, then drag the center of rotation to the desired location (to reset back to center, double click it).
- In the nudge controls, set the desired distance and angle between copies.
- In the nudge controls, push in the Repeat button, then click the rotation buttons once per copy.
Group and Ungroup Lines and Shapes
Grouping allows multiple lines and shapes to be selected and modified as one.
- Select all lines and shapes to be included in the group.
- Choose menu Line > Group.
Ungrouping breaks grouped lines and shapes up, to be selected and modified individually as they were before grouping.
- Select a group of lines or a shape.
- Choose menu Line > Ungroup.
Shortcuts for both group and ungroup can be found on the numeric bar.

Round and Chamfer Corners
Round and chamfer to add a smoother transition between two lines that meet at a sharp corner.
- If necessary, ungroup the shape first by choosing menu Line > Ungroup.
- Select two lines that meet at a corner.
- Choose menu Line > Corner > Round or Chamfer and enter the desired radius or distance.
- Click OK.

Trace an Image
Tracing is a feature that allows you to sketch over an image on your computer into the CAD workspace to copy a design or part.
- Find or take a clear picture of the part to be traced.
- Open the image on your computer (large enough to fit the workspace).
- In China Machine Shop CAD choose File > New > Blank Design.
- Choose menu View > Tracing Paper.
- With the workspace transparent, use the left toolbar drawing tools to trace the shape.
- Uncheck menu View > Tracing Paper.
Add Text
Add text in your design to machine text in your part, or add comments.
- Draw a 2D shape, and on the numeric bar, in the z-control, set the value to a positive number.
- On the left toolbar, click the Text tool.
- Click in the workspace, then type the desired text.
- On the numeric bar, in the Line Type drop list, ensure the line type is set to:
- Auto (for machining text)
- Comments to Self/Machinist (for making a comment)
- On the numeric bar, select a font and size.
For 2D sheet designs where the text is cut fully through the sheet, select a font that does not have interior shapes that will fall out.
Laser Marking
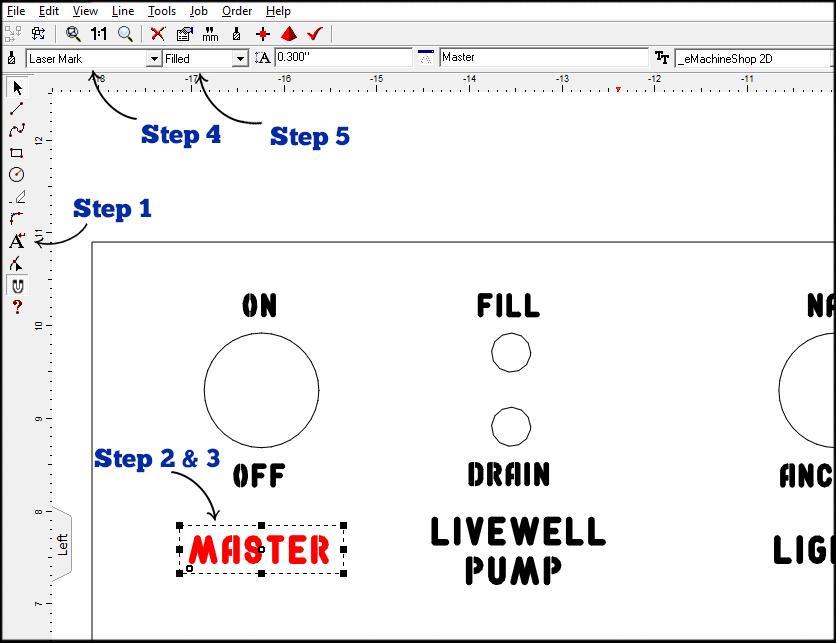
Laser marking is another way to add text and graphics to any flat surface on your part.
- Draw a 2D shape, and on the numeric bar, in the z-control, set the value to a positive number.
- On the left toolbar, click the Text tool.
- Click in the workspace, then type the desired text or place a graphic.
- On the numeric bar, in the Line Type drop list, select Laser Mark.
- On the top toolbar, in the respective drop lists, set the marking type and font style.
Edit Lines and Shapes
Line edit is a tool that allows you to change a line or shape by moving its points or line segments.
- On the left toolbar, click the Line Edit tool.
- Click on a line or shape.
- Drag the lines or points to the desired locations.

Divide Lines and Shapes
Dividing breaks lines and shapes into a specified number of equal segments.
- Select a line or circle.
- Choose menu Line > Divide.
- Enter the desired number of segments.
- Click OK.
Mirror Lines and Shapes
Mirroring flips a line or shape over the horizontal or vertical plane creating its mirror image.
- Select a line or shape.
- Choose menu Line > Mirror > Horizontal or Vertical.
Tip: If you want both the original and mirrored line or shape, Copy & Paste before mirroring.
Create Tangent Lines
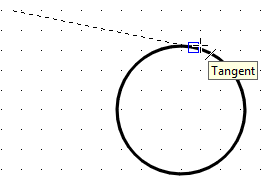
Tangent lines are lines that smoothly meet an arc or circle.
Draw a tangent line to an arc or circle.
- On the left toolbar to ensure Snap to Lines is pushed in.
- Draw a staright line and approach the arc or circle, the line will snap to a tangent position.
For two or more arcs or circles:
- Select two or more arcs and/or circles.
- Choose menu Line > Tangent. All possible tangent lines will be created.
- On the left toolbar, use the Eraser tool to delete unwanted lines.
Contour Shapes
Contouring creates a new closed shape at a fixed distance either inside or outside an existing closed shape.
- Select a closed shape.
- Choose menu Line > Contour.
- Set a distance and placement for the new closed shape.
- Click OK.
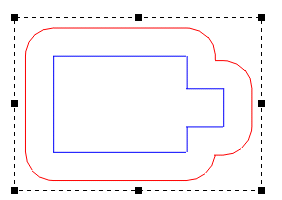
Create Parts with Smooth Curves
Replace sharp edges with smooth shapes around holes and cutouts to create a professional, clean design.
- Delete the outer shape.
- Select all inner features and choose menu Line > Contour > Outside.
- Leaving the contour lines selected, choose Line > Tangents.
- Use the Eraser tool to delete the unneeded lines.
- If any lines meet at a sharp angle, select them and choose Line > Corner > Round.
Nesting Parts
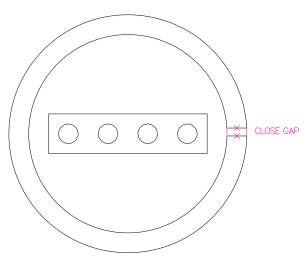
In certain cases with 2D parts you can save material and cost by placing one part inside another.
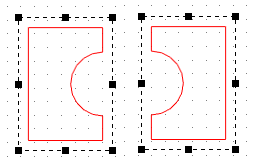
Although the CAD software doesn’t currently support nesting, you can do the following:
- Add a gap in the part as shown.
- Add a Comment to Machinist instructing to close the gap.
Satisfy Multiple Constraints
When designing a part you might need to size or position features to satisfy more than one constraint. View the video to learn how.
Simplify Lines
Lines made up of many small segments result in large files and can slow operation.
Simplify lines into fewer segments to ensure a smoother design process.
- Select a group of line segments.
- Choose menu Line > Simplify and specify the tolerance permitted from the original line (large values will simplify the line better).
- Click OK.
