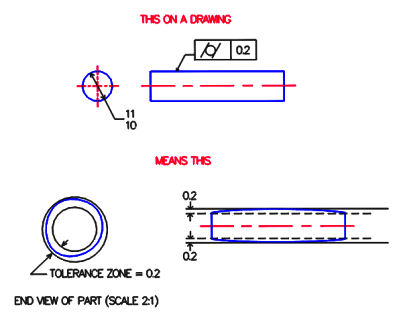
In GD&T, cylindricity tolerance is used when cylindrical part features must have good circularity and straightness, like pins or camshafts. While circularity applies only to cross sections, cylindricity applies simultaneously to the entire surface. Since cylindricity is applied to an individual surface, this tolerance does not need to be related to a datum.
An example of cylindricity tolerance is shown below. In the top figure, a shaft has a cylindricity tolerance applied to it. The boxed symbols can be read “this surface must lie between two concentric cylinders spaced 0.2 apart”. The lower figure shows asamplepart that meets this tolerance. Note that this tolerance requires verification in all three dimensions. Because cylindricity refines the form of a surface, it is treated like flatness in order to perform a tolerance stack.

